Drawing a 2D real estate floor plan: child’s play! Follow our process step by step and you will soon have a clear, informative and professional-looking 2D real estate floor plan. This will allow you to stand out from your competitors and will highlight your real estate listings. In this blog article, we will explain how to draw a sketch and transform it in a professional looking 2D real estate floor plan.
1. TOOLS NEEDED TO DRAW A SKETCH:
 |
 |
 |
|
Graphic paper |
Measuring tape or Ruler or Laser |
2 different colour marker pens (or just pens) |
2. FIVE STEPS: FROM A SKETCH TO 2D REAL ESTATE FLOOR PLAN
You can quickly create your sketch by following our five-step method. and you are well on your way to creating your professional looking 2D real estate floor plan.
STEP 1: DRAW THE FIRST ROOM
- Measure the width and length of the room. Transfer these measurements to the graphic paper.
- Add the doors and windows (and add their measurements, if possible).
- Add the built-in furniture (for the kitchen, bathrooms and toilets).
- Include the room’s name in UPPER CASE lettering.
TOP TIP 1: Use different colour pens
- use one colour for the walls, windows, doors, toilets, etc: for example, black or blue.
- use one colour for the measurements and text: for example, red or green, for.
TOP TIP 2: Draw on floor plan per page.
TOP TIP 3: Choose one unit for all your measurements (metres or centimetres).
Choose either meters or centimetres for all your measurements.
TOP TIP 4: Start with a corner room.
TOP TIP 5: Use one of the symbols shown below (in particular for your bathroom and toilets)

STEP 2: DRAWING THE OTHER ROOMS NEEDED FOR YOUR REAL ESTATE FLOOR PLAN
Once you have completed your first room, just repeat the described method in step 1 until you have drawn your entire property.
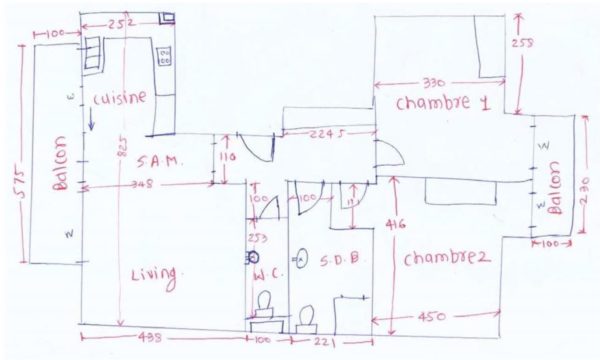
Here is an example of a sketch drawn using this method:
You are almost done in creating your professional looking floor plan.
STEP 3: SCAN or TAKE A PICTURE OF YOUR SKETCH
Once the sketch is finished, scan it or take a picture of it in a generic format (pdf, jpeg, jpg, etc). If the 2D real estate floor plan is produced by your real estate agent, send them the scan or photo of your sketch so that she/he can take care of the production of your 2D real estate floor plan.
TOP TIP 6: Take the picture vertically (to avoid any distortions)
STEP 4: UPLOAD YOUR SKETCH
Once the sketch is finished, process your order on our platform PLAN IT ALL (registration is free) by indicating your chosen level of (2D BASIC, 2D STANDARD or 2D STANDARD with furniture) and the options that you want. Upon receipt of your order, you will receive a confirmation email. You can follow at any point your project from your PLAN IT ALL account (in the JOB section).
TOP TIP 7: Choose the EXTERNAL MEASUREMENTS option
Throughout this period of isolation, the measurements are crucial to give our clients the fullest information on the property that you are commercializing. This allows them to better project themselves in your property.
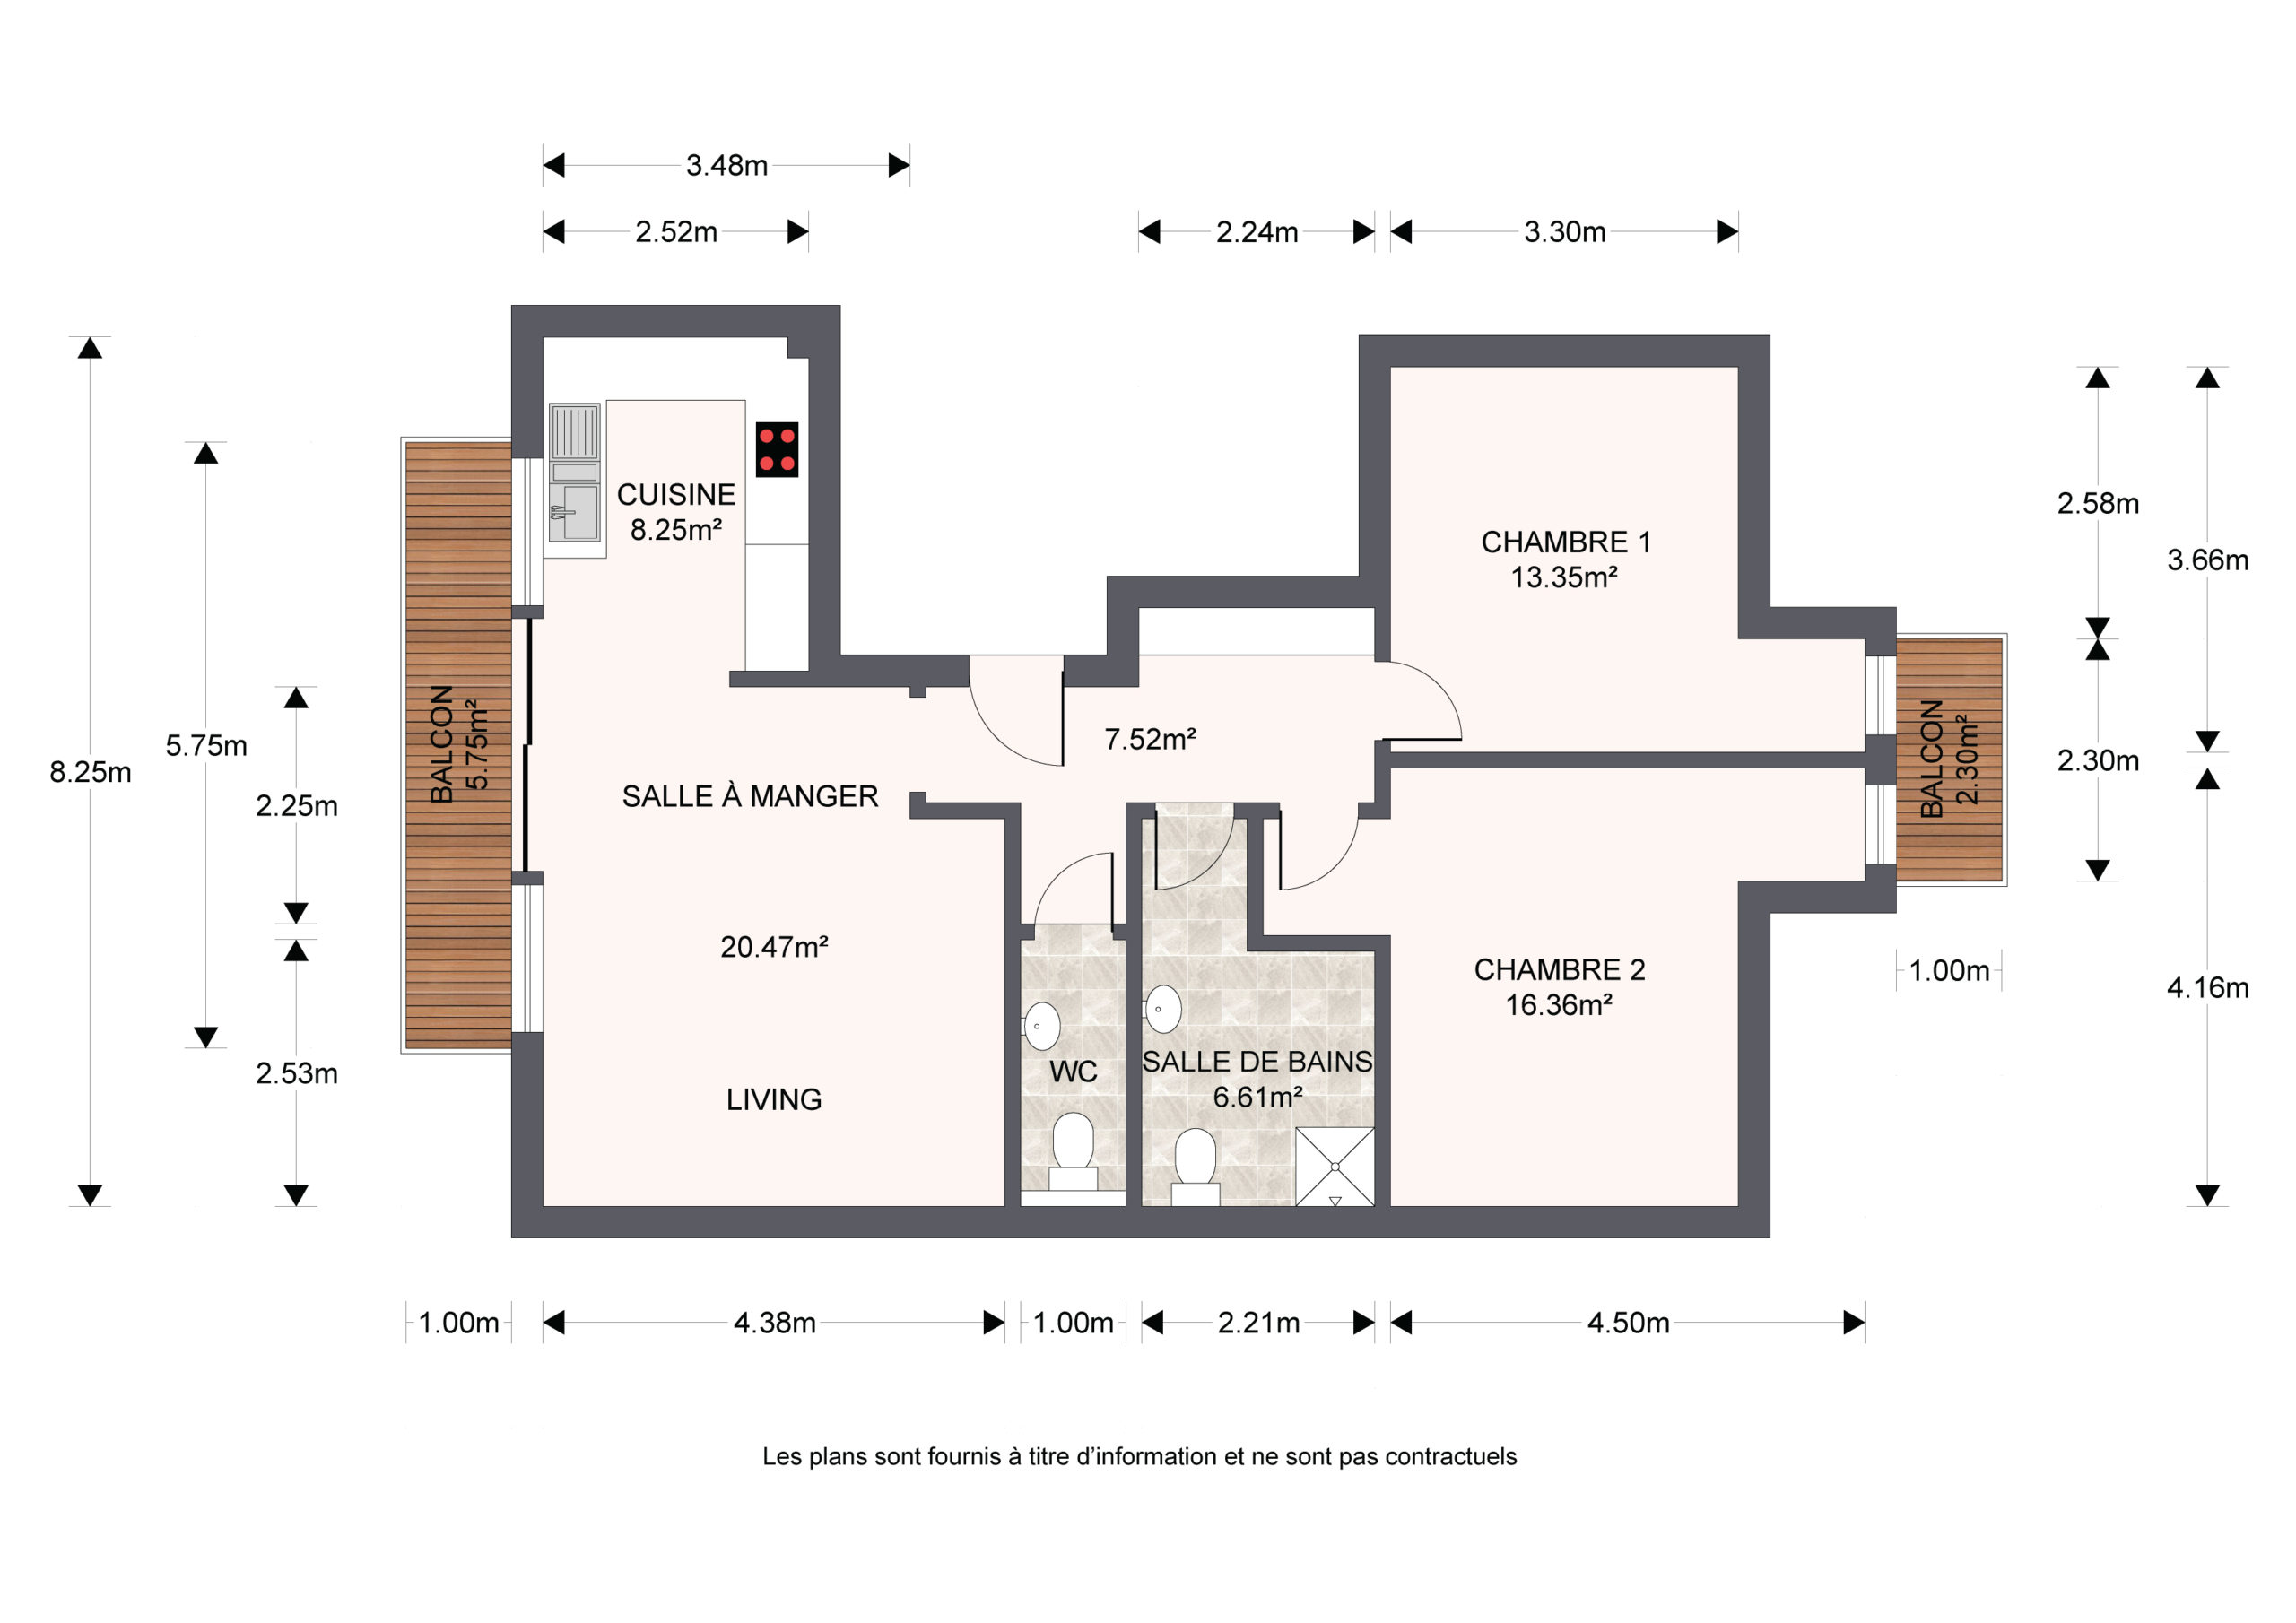
STEP 5: RECEIVE YOUR 2D REAL ESTATE FLOOR PLAN
Within 24 business hours, you will receive an email with a link to your 2D real estate floor plan file. You can also download the plan from your PLAN IT ALL account.
If you want to implement corrections or modifications to your plan, you can do so from the job section of your PLAN IT ALL account: the first set of corrections/changes is free.
Join our newsletter
Volutpat vel turpis nulla lorem sed semper. Aliquam sagittis sem libero viverra vehicula nullam ut nisl.


